Sourdough bread

This period of lockdown has given me the gift of time to give making sourdough bread a go. Attempting it has been a daunting thought until my sourdough fairy godmother turned up in the form of Sanjay, our wonderful friend and neighbour, bearing a jar of sourdough starter.

You can, of course, make your own starter but with that hard bit done, and a lockdown for several weeks, I simply had no excuse!

The recipe I have followed, to the T, is Patrick Ryan’s, of the Firehouse Bakery fame. Simple to follow and a fabulous way to relax an anxious mind.

I have linked to the recipe above but I’ve also reproduced it below for easy access.

So if you have a bag of flour and some patience, here’s what you need to get cracking.

Sourdough bread

Ingredients:

  • 800g strong white flour
  • 10g salt
  • 460ml water
  • 320g sourdough starter

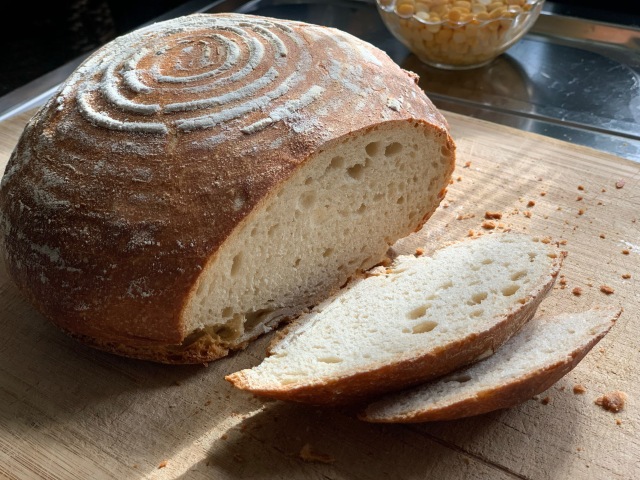
Hot out of the oven and just in time for breakfast!

Method:

  1. Add the flour to a clean mixing bowl. Mix the salt through the flour. Add the water and sourdough starter to the flour. Combine all the ingredients together to form a rough dough.
  2. Turn the dough out on to a clean surface and knead for approximately 10 minutes or until the windowpane effect has been achieved. The dough should be smooth, soft and elastic.
  3. When kneading, do not worry if the dough is slightly wet or sticky. Resist the temptation to add any extra flour.
  4. Return the dough to the mixing bowl, cover with cling film and allow the dough to prove for 4 hours at room temperature.
  5. After 4 hours turn the dough onto a clean work surface and knock the dough back. Knocking back the dough simple involves knocking the air from the dough which helps to equalise the temperature within the dough.
  6. Form the dough into a tight round ball.

To prove & bake using a proving basket:

  1. Prepare a proving basket by lightly dusting with flour. Place the dough, seamed side facing up, into the proving basket. Loosely cover the proving basket with a clean tea towel and leave to prove for another 3 – 3½ hours.
  2. Alternatively, to prove overnight for baking first thing in the morning, place into a fridge and leave overnight.
  3. Using a fridge reduces the temperature of the dough allowing it to prove slower and longer which allows for a greater development of flavour within the dough but also increasing its digestibility. As dough ferments or proves the gluten within the dough breaks down. The longer a dough is allowed to prove the more flavour it will contain and the easier it is for your body to digest.
  4. To bake, preheat your oven to 230°C / 210°C fan assisted (445°F / Gas 8). Place a shallow baking tray into the bottom of the oven to preheat with the oven.
  5. Carefully turn your dough out from the proving basket onto a baking tray dusted with flour (the domed side with the indentations from the proving basket should now be facing up and the seamed side on the baking tray).
  6. Using a sharp knife cut the surface of the dough, this is what is known as the baker’s signature. The dough can be cut up to ½ cm deep. (This isn’t just for aesthetics, scoring the bread also helps control where and how it rises while baking)
  7. Boil a kettle of water then pour the boiled water into the dish that was preheated in the bottom of the oven, this will create steam in the oven while baking.
  8. Place the baking tray with the sourdough into the oven and bake for 30 to 35 minutes or until a good crust has formed and the loaf sounds hollow when tapped on the base.

Alternatively, if you do not have a proving basket, you can use a large glass casserole dish to prove and bake your sourdough.

To prove & bake using a Pyrex dish:

  1. Line a 2.5l round Pyrex dish with a clean tea towel and dust with flour. Place the formed ball of dough into the Pyrex dish lined with the floured tea towel then place the lid (the inside of the lid lightly greased and floured) on the Pyrex dish. Leave to prove for another 3 – 3½ hours.
  2. Alternatively, to prove overnight for baking first thing in the morning, place into a fridge and leave overnight.
  3. The reason for using a Pyrex dish is that it acts like a proving basket. The dish acts as a support to your dough. It encourages the dough the take on the shape of the dish and to prove up and not just to spread out flat. The dough will also be baked in the Pyrex dish.
  4. Using a fridge reduces the temperature of the dough allowing it to prove slower and longer which allows for a greater development of flavour within the dough but also increasing its digestibility. As dough ferments or proves the gluten within the dough breaks down. The longer a dough is allowed to prove the more flavour it will contain and the easier it is for your body to digest.
  5. To bake, preheat your oven to 230°C / 210°C fan assisted (445°F / Gas 8).
  6. Flip the Pyrex dish over so the bowl of the Pyrex dish now becomes the lid. Carefully remove the tea towel.
  7. Using a sharp knife cut the surface of the dough, this is what is known as the baker’s signature. The dough can be cut up to ½ cm deep. (This isn’t just for aesthetics, scoring the bread also helps control where and how it rises while baking)
  8. Cover the dough with the bowl of the Pyrex dish and place the Pyrex dish into the preheated oven.
  9. By baking the dough in the Pyrex dish there is no need to steam the oven. Baking with a lid on the Pyrex dish creates its own steam which will allow the dough to rise and open up while baking. The Pyrex is very similar to the old style of Dutch oven baking.
  10. Bake for 25 minutes then remove the lid from the Pyrex dish and continue to bake, uncovered, for a further 25 minutes until a good crust has formed and the loaf sounds hollow when tapped on the base.
  11. Once baked remove the bread from the Pyrex dish and allow to cool.


Notes:

  1. I have halved the recipe for this loaf.
  2. I have tried the Pyrex dish method as well as the proving basket. Both work equally well so don’t be in a rush to buy a proving basket if you don’t have one already. Although, the proving basket does make the break look a lot prettier.
Posted in Baking, Bread | Tagged , , , , , , , , , | Leave a comment

Summer cakes and a promise to myself

Strawberries are the perfect summer fruit and in season for a period as brief as the English summer itself. I often like to eat them just as they are without being drowned in the customary accompaniment of cream.

This summer cake is as difficult to resist as the perfect box of sweet, ripe strawberries that go into it. A cake that does justice to this wonderfully aromatic berry.

I’ve made a promise to myself to go off deserts for the next month but before that happens this is my one last hurrah for the summer. I might bake some more but the rest of the family are going to enjoy the fruits (or should I say cakes) of my baking.

Strawberry summer cake

Strawberry summer cake


Ingredients:

250 grams self raising flour

250 grams golden caster sugar + 2 tablespoons

250 grams softened butter (I use salted butter)

3 eggs

1/2 teaspoon baking powder

1 teaspoon vanilla extract

1 box ripe strawberries, hulled (approx 200 grams)

strawberry summer cake - in progress

Method:

  1. Keep a handful of berries aside, then quarter the rest. Sprinkle 2 tablespoons of caster sugar over the quartered strawberries and keep aside.
  2. Pre-heat the oven to 180 degrees.
  3. Grease and flour your baking dish. I used a bundt pan.
  4. Cream the butter and sugar together, either by hand or in a mixer.
  5. When they are well mixed, add in the eggs, one at a time, beating continuously.
  6. Add a teaspoon of the vanilla extract.
  7. Add the baking powder to the flour and mix well with a fork or a whisk to incorporate as much air in to it as you can.
  8. Now add the flour, one tablespoon at a time, into the eggs-butter-sugar mixture. Mix in slowly so that it is well incorporated.
  9. Place a few of the macerated strawberries at the bottom of the baking dish. (These will caramelise while the cake cooks.)
  10. Once the cake batter is ready pour it very gently into the baking dish.
  11. Insert more strawberries into the batter. You can choose to be as artistic or random as you like. The strawberries wilt into the cake anyway.
  12. Bake for about 25-30 minutes depending on your oven.
  13. Check the cake after 25 minutes by inserting a skewer or a knife. If it comes out clean, the cake is done.
  14. Take it out of the oven. Cool and unmould.
  15. You can choose to add a whole heap of strawberries over the top and dust with some icing sugar or if you can’t be bothered, cut into wedges and serve.

I would like to say serve with ice cream or a cup of coffee etc. but truth be told, I’d rather just whip the spoon out and dig in.

The month ahead with no desserts to see me through it is going to be hard. But I’ve made a promise ( I don’t like the word – diet) to myself and I’m going to see this through!  But until then, I’m going to savour every bite of this cake.


This post is part of the Bar-A-Thon challenge for the prompt ‘a promise’.

barathon

Posted in Cakes, Celebrations, Desserts | Tagged , , , , , , , , | 6 Comments

Watermelonade

Yup. It’s exactly what it says – a wonderful blend of watermelon juice and lemonade.

Cool and fresh and just the thing to sip in the shade when the sun is blazing.

If, like us, you have to balance familiar tastes with a slightly adventurous spirit you can create ‘his and hers’ versions like I did.

He has the classic watermelonade and I have the same with a splash of vanilla. Delightful and yet, individual. How wrong can you go with that?

Lemonade doesn’t always have to look like, well, lemonade. Does it?

Watermelonade : When life gives you watermelons....

Watermelonade : When life gives you watermelons….

Ingredients:

3 cups fresh watermelon juice

2 cups classic lemonade (made with sugar)

1 teaspoon vanilla extract

lots of ice


Method:

  1. Mix it all together.
  2. Pour into tall glasses. Top with ice.
  3. Pick a favourite book and retreat to the garden on a hot summer’s day.

Number 3 is actually wishful thinking on my part. Sunny days in the garden are usually spent with me trying to dodge the football being kicked around by the boys and turning a deaf ear to the pleas to join in.

This post is part of the Bar-A-Thon for the prompt ‘Wishful thinking’.

barathon


Posted in Drinks | Tagged , , , , , , , , | 4 Comments

Lemon blueberry loaf

This cake is the result of loads of indecision and the urge to clear out my fridge. I first set out to make a lemon and poppy seed pound cake only to discover that I didn’t have any poppy seeds. I saw a box of blueberries that were sitting in the fridge and thought they might go nicely with the lemon and then wondered if I should make some healthy blueberry muffins, instead. As you can see, clearly, decadence won the battle.

Lemon and blueberries go so well together that I think that lemon and poppy seed cake might have to wait a while. You’ll find that you don’t really need an excuse to make this over and over again.


Lemon Blueberry Loaf

Lemon Blueberry Loaf

Ingredients:

250 grams self raising flour

250 grams unrefined caster sugar

250 grams salted butter

1/2  teaspoon baking powder

3 eggs

zest and juice of 1 whole lemon (1 tbsp of zest and 2 tbsp of juice)

1 cup blueberries

Equipment: Standard loaf tin – 2lbs or 9×3, strong whisk or stand mixer

Method:

  1. Preheat your oven to 180 C. Generously butter a loaf tin or silicon mould, dust with flour and keep aside.
  2. In a large bowl, add the sugar and then the lemon zest. Rub the zest and sugar crystals together with the tips of your fingers. This releases the oil from the zest and flavours the sugar.
  3. Add the baking powder to the flour and whisk well.
  4. Add the sugar and butter to the bowl of your stand mixer and beat until nicely mixed. Add the lemon juice at this stage.
  5. Add the eggs, one by one and mix on a medium speed until you have a wet, sticky and lemony mixture.
  6. Add the flour, gradually and gently. It’s better if you do this stage by hand, folding in the flour until you have a lump-free batter.
  7. Add in the blueberries and mix well.
  8. Pour the batter into your buttered loaf tin.
  9. Bake for about 40-45 minutes, until the top is browned and a skewer inserted in the cake comes out clean.
  10. Cool and slice.

This yields a moist loaf that keeps well until the next day, at least.


Posted in Baking, Cakes, Desserts | Tagged , , , , , , , , , , | 2 Comments

Flatbread or Chapati French ‘toast’

Half term holidays mean easy mornings, some lie ins and time for a proper breakfast.

The last couple of months have been hectic with the little man saying good bye to his nursery and hello to proper school. New timings and the earl morning frenzy have taken a toll on all of us and consequently, on the blog.

But now, we’ve had a fun filled but easy week.  And of course, some good food, made and eaten at leisure.

So here’s what we came up with over the weekend. Our version of a savoury French ‘toast’ but made with leftover chapatis. You can also use some flatbread like ‘khoubuz’.

Leftover chapatis, eggs, seasoning, some chopped tomato and a scant teaspoon of chopped coriander – a colourful breakfast or indeed dinner is ready in minutes.

It went down a treat! Give it a go, won’t you?

Savoury french 'toast'

Savoury french ‘toast’

Ingredients:

3 chapatis

3 pats of butter

3 tablespoons of cold milk or cold water

2-3 cubes of cheddar (approx.  8-10 tablespoons), grated

1 medium tomato, peeled and chopped

2 teaspoons of chopped coriander

salt and pepper to taste

Whole wheat chapati 'french toast'

Whole wheat chapati ‘french toast’

Method:

  1. Beat 3 eggs with the milk or water. Add salt and pepper and whisk well.
  2. Add the grated cheddar, chopped tomato and coriander leaves. Stir well with a fork.
  3. Now heat a pan over a high flame.
  4. Add the chapati to the pan. When it is warm, butter it generously on both sides.
  5. Pour a third of the egg mixture over the chapati. Swirl the pan so that the chapati is coated with the egg-cheese-tomato mixture.
  6. Cover with a lid and let cook.
  7. When the egg has started to set, flip over as you would an omelette and turn off the flame. This will allow it to cook till the egg is just done.
  8. Transfer to a plate and serve hot.
  9. Repeat for the other chapatis.

Ketchup and cutlery optional!

Dark Autumn mornings and evenings are brightened up with a colourful, hot and relaxed meal.

Posted in Breakfast, Quick Suppers, Savoury | Tagged , , , , , , , , , , , , , , , , | 3 Comments

A labour of love and Preserved Lemons

A few weeks ago I attended my first block printing class and had the most awesome day. Deep in the heart of Surrey, Tobias and the Angel run these classes for creative, artistic minds as well as complete luddites like me. It doesn’t matter who you are or what your skill level is, Angel and Trudi welcome you like they have known you for yonks. First up is a 101 on block printing, and then the rest of the day is spent experimenting and getting your hands dirty, quite literally. It’s like a crafts day at a favourite aunt’s. Angel puts on a fabulous lunch and tea and chats about everything under the sun.

If you’re looking for a detox day, this compares with a five star spa. I came away feeling fabulously relaxed and very accomplished. Take a look at the table runner I made.

Table runner - Tobias and the Angel

Table runner – Tobias and the Angel


But this post is also about the most delicious salad I’ve ever had. Yes, ever. Peaches, mixed leaves, avocado and heavenly chunks of preserved lemons. I’m prepping for the salad by making some preserved lemons. I know I can always use the store bought version but it wouldn’t do Angel’s salad justice. It has to be a labour of love, just like my table runner. The post on the salad will have to wait.

Preserved lemons

Preserved lemons

Ingredients for the preserved lemons:

5-6 unwaxed lemons

250 grams (approx.) Maldon sea salt or any other sea salt flakes

Method:

  1. In a preserving jar or any other clean jar, pour enough salt to cover the base.
  2. Wash and dry the lemons. Slit them vertically but not quite to the end.
  3. Fill each lemon with about a tablespoon of salt.
  4. Cram as many lemons as you can fit into the jar.
  5. Top with salt.
  6. Seal the jar.

By now, the cramming of the lemons in the jar will have released quite a bit of lemon juice. If not, you can add some more juice and salt so that the jar is completely filled.

That’s it, really. Leave it in a cool place for 3-4 weeks. During this time, shake the jar a bit to redistribute salt and juice.

The preserved lemons are ready when the peel looks soft. At this point in time, the lemons need to be refrigerated and used as required.

My jars are still sitting on the kitchen counter and I’m waiting rather impatiently to use them to make Angel’s salad. Until then, I have to breathe and keep calm.


Posted in Compotes and Preserves, Savoury | Tagged , , , , , , , | 10 Comments

Spiced Apple cake

A dense, moist and flavourful cake that has Autumn written all over it. Yes, it’s a late post but this cake was too good not to share. Better late than never!

The apple tree in the back garden of our new house gave us a lovely welcome present. 3 kilos of apples were knocked down with a football (soccer, if you must) and a little help from our friends. (Welcome to new age apple picking.)

I first made a big batch of apple butter with some warming apple pie spice. Most of it was polished off over breakfast. But I kept 2 cups aside to make this cake. Am I glad I did!

I’m now looking forward to making this a regular on the baking list, thanks to our resident apple tree.

Spiced Apple cake

Spiced Apple cake

Ingredients:

250 grams flour

2 1/4 teaspoons baking powder

2 cups spiced apple butter

120 grams lightly salted butter

3/4 cup muscovado sugar

2 eggs

1 teaspoon good quality vanilla extract

1/2 cup chopped walnuts (optional)


Method:

1. Preheat oven to Gas 4 or 350 F. Grease and paper an 8″ cake tin.

2. Sieve the flour and baking powder together about 2-3 times so that you incorporate as much air as possible.

3. Beat the butter, sugar and vanilla together. Add in the eggs and continue to beat until light and fluffy. Add in the apple butter. Mix well.

4. Add the flour mixture, a little at a time. Mix well by hand (or with your mixer at a low speed). Mix in the walnuts.

5. Pour batter into cake tin and smoothen with a spatula.

6. Bake for about 45 minutes. The top should be golden brown and a skewer inserted into the centre should come out clean.

7. Cool for about 10-15 minutes before releasing it from the cake tin.

8. Cut into wedges and savour every last crumb.


Notes:

1. Oven temperatures can vary so work with what’s best for your oven. The skewer test is the best way to tell if it’s done.

2. You can add more apple pie spice or a mix of powdered cinnamon, ginger, cloves and all spice. I left this out as the apple butter had all of this in abundance.

3. The muscovado sugar gives it a lovely dark colour that I like. It can easily be replaced by regular sugar.

4. If you choose to use unsalted butter, add a pinch of salt to your cake batter.

Posted in Baking, Cakes | Tagged , , , , , , , | 7 Comments

Gingerbread men

When the weather is this wet and cold, I don’t need an excuse to fire up the oven. So when the little man asked if we could make gingerbread men as our Sunday activity, he didn’t really need to sell it to me.

And who wants to go shopping for ingredients when it’s pelting down?

Here’s a simple recipe from Waitrose that mostly uses stuff you would have in the store cupboard.

I adapted it further – see my notes toward the end. I’m really not a fan of rushing out to buy ingredients that would sit in the larder until well past their expiry date.

Happy Gingerbread Men


Ingredients:

100 grams unsalted butter, softened

100 grams light muscovado sugar

1 .5 – 2 tablespoons honey

2 tablespoons crystallised ginger (blended to a paste)

250 grams flour

2 1/4 teaspoons baking powder

1 tablespoon mixed spice

a generous pinch of salt

Optional, for decorating:

2-3 tablespoons of melted chocolate

silver sprinkles

Gingerbread men attempting an 'Abbey Road crossing'

Gingerbread men attempting an ‘Abbey Road crossing’

Method:

1. Grease and line a baking tray or cookie sheet. Pre-heat the oven to 180 C or Gas 4.

2. In a pan, heat the sugar, butter and honey until well combined into a thick syrup. Add the paste of crystallised ginger and mix well.

3. Separately, mix all the dry ingredients with a fork, airing the flour well.

4. Pour the syrup into the dry ingredients and mix well till it forms a stiff dough. Knead with your hands to make it pliable.

5. Roll the dough out between 2 sheets of parchment paper to 5 mm thickness. Cut the gingerbread men using a cookie cutter. Peel away the extra bits to leave just the gingerbread men silhouettes. Leave them for 5 minutes or so before you carefully transfer them to the pre-greased baking trays with the help of a butter knife.

6. Bake for 8-10 minutes until golden brown.

7. Cool the gingerbread men for about 20-30 minutes.

8. Go to town with your decorations.

And while your gingerbread men are getting ready, why not take your mind off the wait? Check out how well you know the story by taking The Gingerbread Man quiz.

Notes:

1. The original recipe is for Gingerbread Christmas trees from the November 2014 issue of Waitrose Kitchen.

2. I have used 1.5 tbsp of honey in place of 3 tbsp golden syrup.

3. I used crystallised ginger that I had (6-7 cubes blended to a paste) instead of the ground ginger. It gives the cookies a heady kick of ginger.

4. Oven temperatures vary. Check your gingerbread men after about 8-10 minutes. I followed the original times (10-15 minutes) and my first batch was more tanned than the second. See pic below.

Who's the fairest of them all?

Who’s the fairest of them all?

Posted in Baking, Cookies | Tagged , , , , , , , | Leave a comment

Peppa Pig party games

If you’ve been following my Peppa Pig Party theme, you’ve probably wondered about the games: Playing musical muddy puddles, Passing Mr. ‘Dine-saw’, Sleeping Piggies

Armed with ideas from Pinterest and some of our imagination, this is what we came up with. They are simpler than you think.

Musical muddy puddles

Musical muddy puddles

1. Musical Muddy Puddles

As you’ve probably guessed, this is a variation of musical chairs. Each child was given a paper ‘muddy puddle’. While they ran around as the music played, I sneaked away one of the ‘puddles’. When the music stopped, each child had to bag a puddle. The one left without a puddle was ‘out’ (and became my assistant to sneak away the next puddle). So it went on until we had a winner.

2. Passing Mr. Dine-saw

Again, a variation of the classic ‘passing the parcel’. The kids passed a green dinosaur around as the music played. When the music stopped, the child holding the dinosaur chose a gift out of a bag and was ‘out’ of the game. (The gifts kept them busy as the game continued.)

3. Sleeping Piggies

A variation of Musical Statues, this one kept them busy while the food was being laid out. It also helped calm them down from the hectic activity so that they would be happy to sit down and enjoy the snacks.

Basically, the kids wiggle to the music and oink like Peppa Pig.  When the music stops, they all flop down and pretend to be ‘sleeping piggies’. The first one to move or open their eyes is out. (It’s easy to get a few them of out at a time, if you’re keen to move them on to the table.)

The ‘oinking’ went down quite well, I must say. We even had the parents joining in, under the guise of coaching their little ones. 🙂

We don’t need excuses to have fun, do we now?

Posted in Celebrations | Tagged , , , , | 1 Comment

Muddy Puddles Cake

A Peppa Pig themed party wouldn’t be complete without a Peppa cake, would it?

To me, muddy puddles cues decadent chocolate cake that you can sink your teeth into and go Aaah! Maybe it’s just me but I would eat chocolate cake for breakfast if I could and if it didn’t set an example to my ‘ever eager to copy everything that he shouldn’t’ 3 year old.

My go-to recipe for chocolate cake is the Hummingbird Bakery’s classic chocolate cupcake recipe. I topped it with fondant icing and a large chocolate puddle for Peppa and George to wallow in.

I don’t much care for cake decorating. As you can tell, this one won’t win competitions. But it’s a simple and homely cake that even a cake decorating novice like me can manage. Take a look below.

I did, however, have a very happy 3 year old. That’s prize enough for me.


Muddy Puddles cake with Peppa and George

Muddy Puddles cake with Peppa and George


Ingredients:

400 grams flour

80 grams dark cocoa powder

560 grams caster sugar

6 tsp baking powder

1/2 teaspoon salt

160 grams salted butter, softened

480 mls whole milk

4 medium eggs

1 teaspoon vanilla extract


Other bits and pieces:

500 grams shop bought white fondant icing

200 grams green fondant icing

1 box Willie’s Cacao Chef’s Drops

20″ cake tin, greased


Method:

1. Preheat the oven to gas 4 (180 C or 350 F).

2. Sieve the flour, cocoa and baking powder together so that it’s light and airy.

3. Beat the butter and sugar together until it’s creamy.

4. Whisk the eggs well, add in the milk and vanilla extract.

5. Add the milk and eggs mixture to the butter and sugar mixture until well incorporated. You could use a stand or handheld mixer on a low speed.

6. Add in the flour mix a little at a time, folding it in but not really beating it. Once it is smooth and free of lumps, pour it into the greased cake pan.

7. Bake for about 30-35 minutes. To test, insert a knife into the cake. If the knife comes out clean, your cake is done.

8. Let cool overnight and cover with fondant the next morning or after 3-4 hours.

9. For the muddy puddle, melt chocolate buttons and smooth the melted chocolate onto the fondant with the back of a spoon.

10. Place the Peppa and George figurines in the centre of the cake and Voila! There it is, your Muddy Puddles Cake. Happy toddler, guaranteed.


PS: I did sneak in a slice for breakfast the next day. Shhh, don’t tell!


Notes:

1. Baking time may vary depending on your oven. Best to follow your own baking times, check for browning and follow the knife test.

2. For the green ‘hedges’ border, I simply grated some green icing and arranged it around the cake.

3. For the chocolate puddle I used Willie’s Cacao Chef drops. My new favourite ingredient!

4. I’ve multiplied the original recipe by 4 and used salted butter.

Posted in Baking, Cakes | Tagged , , , , , , , | 1 Comment

Birthday celebrations with Peppa Pig

Peppa pig and her little brother, George, have taken over not just our living room but also our lives. Our 3 year old is obsessed with the TV series and don’t be too surprised if you find us mouthing dialogues and also ‘oinking’ in character.

What else could possibly do justice to a 3rd birthday celebration than a Peppa themed party? Armed with ideas from Pinterest and various other sites, it turned out to be quite an enjoyable afternoon – this included eating a Muddy Puddles cake, playing Passing Mr. Dine-saw, Sleeping Piggies and even jumping up and down in muddy puddles.

I must admit that I did go a bit mad with the theme. 🙂

1. Muddy Puddles Cake

Muddy Puddles cake with Peppa and George

Muddy Puddles cake with Peppa and George

2. Playing musical muddy puddles, Passing Mr. ‘Dine-saw’, Sleeping Piggies

Musical muddy puddles

Musical muddy puddles


On a different but related note, we kicked off the celebrations with a visit to Peppa Pig World the weekend before the party. If the link makes your fingers itch to book and visit, here are some words of caution. Weekdays are best if you don’t want to queue up for 30 minutes for a 3 minute ride. And do carry plenty of wet wipes for those sticky fingers. Of course, this is not rocket science for parents of toddlers but it’s good to bear in mind, if you’re the kind that can get carried away by the thought of theme parks.

Peppa Pig World

Peppa Pig World

If you haven’t yet discovered Peppa Pig  look no further than YouTube. Just don’t blame me when you get hooked on to it yourself. 😉

Posted in Baking, Cakes | Tagged , , , , , , , | 2 Comments

Apple butter

No, it’s not really butter. It’s a cross between compote and a jam.

It doesn’t really need a recipe and it takes about 5 minutes to throw together and another 10 minutes to cook. So if you like apples, there’s really no reason to shy away from it. The bonus for me is that the whole house smells like apple pie!!

Apple butter with a generous pinch of mixed spice

Apple butter with a generous pinch of mixed spice

Ingredients:

1 large cooking apple

2-3 sweet apples (medium sized ones)

1 heaped tablespoon caster sugar

2 tablespoons salted butter

1/2-3/4 teaspoon mixed spice

Method:

1. Core, peel and dice the apples. Retain some of the peels.

2. In a pan, melt the butter and add the sugar. Swirl it together. Then throw in the apple chunks along with 2-3 pieces of the peel.

3. Cover and cook till soft on medium heat. Add the mixed spice and stir well. When the apples are cooked, lower the heat and leave on the hob for about 2-3 minutes till the bottom is slightly caramelised.

4. Take off the heat and cool.

You can enjoy this in a number of ways – spread on a hot piece of toast or muffin, smother your pancakes with it, or top your morning bowl of oatmeal.

Millet porridge with Apple butter

Millet porridge with Apple butter

The best way, of course, is to enjoy it with a spoon, slowly, savouring every tiny bit of it.


Notes:

1. The apple peels add a bit of warm, autumnal colour to the apple butter. You could omit them if you want a lighter, golden apple butter.

2. I used a combination of cooking apples and eating apples to balance the tartness and to reduce the sugar I needed to use.


Posted in Compotes and Preserves | Tagged , , , , , , | 22 Comments

Minty apple lemonade

This is a twist on a classic and doesn’t really need a recipe. Minty apple lemonade is a perfect companion to a sunny and warm day. The mix of flavours also makes it a good pairing with a simple supper like this one.

If you have some apple juice sitting in the fridge, do give this a try. The lemon, mint and the sugar really jazz up plain old juice.

IMG_6540_2 IMG_6488

What you need:

300 mls unsweetened or fresh apple juice

1.5 tablespoons sugar

juice of 1 large lemon

10-12 mint leaves, roughly torn

Putting it together:

1. With a mortar and pestle, crush the mint leaves and sugar together.

2. Add this to the apple juice. Mix in the lemon juice.

3. Stir well. Pour into a large glass and add ice cubes (optional).

4. Sip slowly and watch the world go by.


Notes:

1. I used cloudy, unsweetened apple juice.

2. The sugar you need will vary depending on the apple juice you use. Start with less – you can always add more sugar.

Posted in Drinks | Tagged , , , , | 5 Comments

Courgette and red pepper bites

Cleaning out the fridge, last weekend, produced an odd assortment of veggies. There weren’t enough for one proper recipe but that got me thinking – what could I make if I threw them all in together.

Here’s what they turned into – mini courgette (aka zucchini) and red pepper bites.

Perfect for a lovely light dinner with a refreshing salad and a tall, cool glass of minty apple lemonade.

We’re celebrating the last of the summer evenings!

IMG_6510

Ingredients:

2-3 courgettes, grated

3-4 green onions, chopped fine

2 pods garlic, lightly crushed

1 tsp dill, roughly chopped

1 red pepper, diced and lightly roasted

1 potato, boiled and mashed

salt to taste

1/2 teaspoon pepper

1/4 cup cheese, parmesan

1/4 cup breadcrumbs

Equipment: 1 muffin tin, greased

Method:

1. Saute the garlic in hot oil. The add the chopped onions, red pepper and courgettes. Saute for about 5-10minutes till the pepper and onions are softened. Cool.

2. Mix the above veggies with the mashed potatoes. Add the dill, salt, pepper, cheese and breadcrumbs. Knead well and shape into patties.

3. Press the patties lightly in to the greased muffin tin. If you are using the cupcake cases, lightly grease them too.

4. Bake in a preheated oven at 180 C / 350 F / gas 4 for about 25 minutes rotating the trays around and across shelves to ensure even baking.

5. Serve hot with a relish or tomato ketchup and add a tall glass of lemonade to beat the heat.

IMG_6488

What exciting dinners do you have planned this week?

Notes: The cupcake cases are great for serving these as appetisers. Keeps the hands clean..ish.

Posted in Appetisers and Nibbles, Baking, Savoury | Tagged , , , , , , , , , , | 9 Comments

Sunshine time

I’ve been sent some sunshine by Shalini the blogger behind Tale of Two Tomatoes. (Thanks Shalini! And apologies too, this has been long overdue)

It’s a grey and wet day here today so thank you for the warmth that the Sunshine Award brings with it. 🙂 I’m very touched.

If any of you are hankering after Iddiyappams or Kottayam fish curry or Pongal Payasam head over to Tale of Two Tomatoes and discover these and other gems from Shalini’s Keralite kitchen.

So what is this Sunshine Award? Here are the rules. All but the last are easy to follow.

sunshine-awardRules Of The Sunshine Award
• Display the award on your blog.
• Show your gratitude and link back to the person who nominates you with the award.
• Nominate up to 10 of your favourite deserving “bloggers who positively and creatively inspire others in the blogosphere”.
• Link the nominees in your post and let them know they have been awarded.
• Write 10 interesting things about yourself.

A few of my favourite bloggers are listed here. These are blogs that I keep going back to to discover interesting ideas or perspectives and I always come away with a big smile on my face. So in no particular order, here they are.

1. Shailaja V from Diary of a Doting Mom: Shailaja’s blog has become my go-to parenting site for her wisdom and for the fun ways in which she is bringing up little miss G.

2. Vidya Sury from vidyasury.com : I head to Vidya’s blog when I’m feeling a little low and need a pick me up. She has never failed me!

3. Cristina Trinidad from Filling my Prayer Closet : Cristina writes on religion, family ties and relationships, all peppered with some fabulously real pics. All I will say is that it makes for a pretty compelling read. Head over to find out for yourself.

4. Corinne Rodrigues from EverydayGyaan : Corinne, I think, is a mind reader. Motivation, inspiration and a reality check – I find all this and more at Corinne’s blog when I need it the most.

5. Sunila Vig’s posts on yoga, meditation and living a peaceful life really resonated with me during the A-Z Challenge. You can find her at Between you and me.

6. Tulika Singh from ObsessiveMom : Love reading? Would you like to know a little more about the men and women behind the literary works you love? Meet them on Tulika’s blog.

7. Kajal Kapur – For me, Kajal’s Movie Massala is my imdb and movie wiki rolled into one. Nuff said!

8. Eli E Zachariadis from Expatliv – armchair traveling with a special Mumbai bias, makes me love her blog even more.


And now, as per the rules, here are a few things you may not know about me.

1. I’ve done the world’s highest bungee jump.

2. I can’t ride a bicycle. (Yes, it’s true.)

3. I love dark chocolate.

4. Wine makes me sick. 😦

5. I’d rather wash the floors and do the dishes than iron clothes or sew buttons.

6. My favourite way to relax is through yoga and of course, pottering around the kitchen.

7. I used to read 3-4 books a week until I became a mommy. Now I read 3-4 pages per day.

That’s quite enough about me. Go on and explore the wonderful blogs I’ve listed above. You can thank me later. 🙂


Posted in About the weekend Baker | Tagged , , | 16 Comments