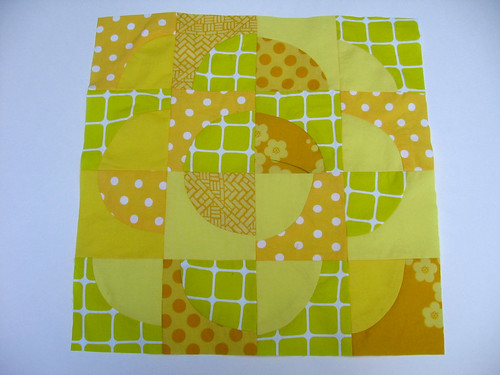
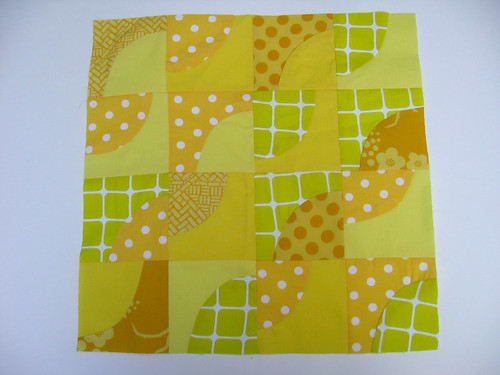
For our May blocks in the do.Good stitches bee in my circle, we each chose a color and are making our blocks all in that color in any design we want to make a "box of crayons" quilt. I got yellow and was excited because I have a lot of fun yellow fabrics, although when I actually looked through them I realized some were more mustardy... I tried to balance the orangey yellows with other bright lemony yellows, so hopefully these will still read as the yellow blocks in the finished quilt. I chose a wonky drunkards path for my two blocks, and had fun playing around with different arrangements, finally settling on these two layouts.
The drunkard's path block holds a special place in my heart because it was one of the four blocks in the first small throw quilt that I made - all hand pieced and hand quilted, as I learned in a class I took that taught a very traditional approach to quilting. Handpiecing the curves, it is not hard to get them all to line up, but it takes a while obviously. I thought it would be fun to try a looser, more wonky approach to the curves where I could piece them on my machine without worrying too much about cutting the shapes according to an exact template and then exactly matching the edges. It worked so well that my first batch of blocks didn't feel wonky enough and I intentionally made some of the later ones more wonky!
Since I know a lot of folks are intimidated by piecing curves, I thought I would share a tutorial for how I made these blocks. The circles may not match exactly when you piece them (although you could probably adapt this approach to get a less wonky result) but I really like how the finished blocks look. If you are interested in learning how to sew curves more exactly, Lesly on PickleDish is hosting a Ogee quiltalong and today she had a post and a video showing how she pieces curves - it's pretty similar to how I do it below, but she is more careful to keep an exact 1/4" seam allowance and she uses fun tools like tweezers!
Today I'll show you how to sew the curved piece which you assemble into a finished block, and Tuesday I'll be back to share different layout options for this block [Update: layout options post here].
This makes a 12.5" square block (12" square when pieced in a quilt), but could easily be adapted to other sizes.
Fabric requirements: Sixteen ~5" square pieces of fabric (after you have done a few to practice you could get away with somewhat smaller squares). This would work great with charm squares! Or you could make a block out of two fat quarters and have a bit left over. (Because you make the blocks large and trim them down, this approach is a bit fabric intensive).
To start, freehand draw a curved 1/4 circle line on your fabric square starting about 1/3 of the way along the edge.
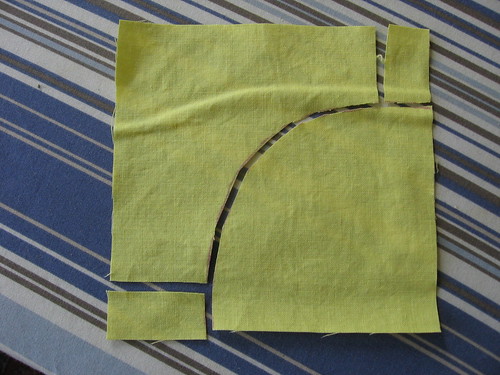
Cut along the line you marked, and then cut off about 3/4" from either end of the outer curve piece, as shown above. You can cut these using scissors several at a time and can use either half of your first one as a template to cut along as you go. Cut out all the fabric squares and you will have 16 outer curve pieces and 16 inner curve pieces.
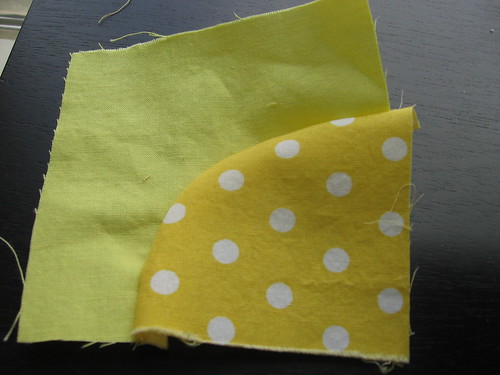
The next step is optional but helps the blocks come out nicely and not puckered. You'll see if you lay an inner curve piece on top of the outer curve piece that the two curves don't totally match. You want the two edges to be an equal distance apart (~1/2"-3/4") the whole length of the curve - to echo each other if that makes sense (like arcs of a rainbow - sorry for the cheesy example). So, you can just trim a bit off the curve of the inner curve piece to make it less of a sharp curve. It really doesn't have to be exact, and you can either do them all at once or do them as you go to sew them.
Put the inner curve piece facing up with the corner facing to the upper left, and then place the outer curve piece facing down on top, with the corner facing to the lower left, as shown above.
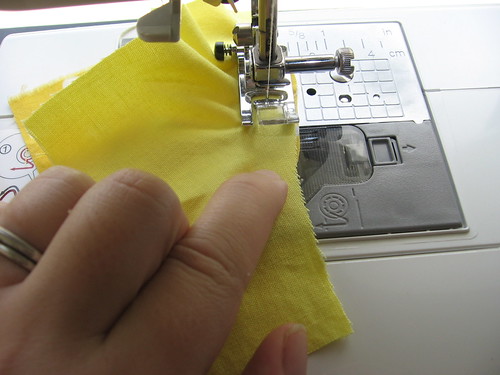
Start sewing down the seam, and pull the upper curve piece as you go to keep it lined up with the inner curve piece. You will be slowly turning both pieces as you go to follow the curve of the bottom (inner curve) piece and continue sewing roughly 1/4" from both edges. The fabric only needs to be lined up a bit at a time, so you can tug it into place, sew a few stitches, tug some more, keep sewing, etc.
It may look a little puckery behind or in front of your foot as you go, but as long as you don't sew over a pucker it should be fine. This may sound like it will take a long time, but really it doesn't take long, especially once you have done a few and gotten the hang of it.
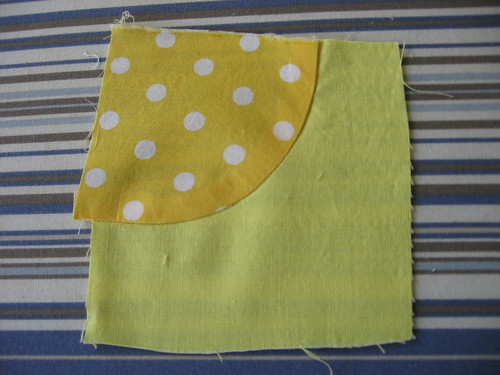
When you are done sewing the seam, flip it open and it should look about like this.
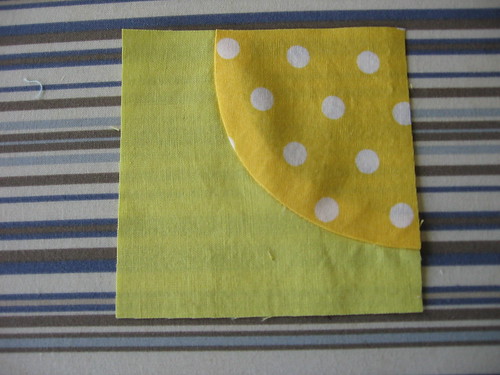
Press the curve in place. You can either press the seam either in towards the inside of the curve or out towards the outside of the curve, it doesn't matter - sometimes the fabric seems to be wanting to go one way or the other, so I usually just did whatever seemed most natural.
After pressing, trim down to a 3.5" square (or just a smidge larger if you are worried about whether your seams will be exactly 1/4" in assembling the block). Arrange blocks as desired in a 4 x 4 grid (see my second post for layout ideas) and then sew together the rows of four blocks into strips, and then the strips into blocks.
Let me know if you have any questions about this technique! If you have been wanting to try sewing curves but unsure about it, I hope this will encourage you to give it a try!
DONATE TO SUPPORT THIS TUTORIAL - this tutorial is provided free of
charge, if you would like to show your appreciation and support the free
patterns I provide here, you can donate here
(or it helps if you click through to any of the amazon links on this site,
whether you purchase that particular product or not!). Thanks for your
support!
I'm linking up to Quilt Story's quilt block tutorial list:




I am definately going to give this a try, you have made it look so easy!
ReplyDeleteThanks for the tutorial- I've tried figuring it out from a pattern, but I need help!
ReplyDeleteI love it! Thanks for taking the time to show us how you did it.
ReplyDeleteHey thanks for linking to my curved seams video - I just now saw that you tweeted me about it! That's me- a day late and a dollar short!I love your wonky DP - it's so much fun! And I agree with you about all the possible layouts - it makes one simple block a gift that keeps on giving. Adding you to my Google Reader feed!
ReplyDeleteThis is a great tutorial! I'm going to try it! I especially like your reassurance that everything will be fine in the end; I needed that about sewing curves :-)
ReplyDeleteThis is awesome. I'm bookmarking :)
ReplyDelete